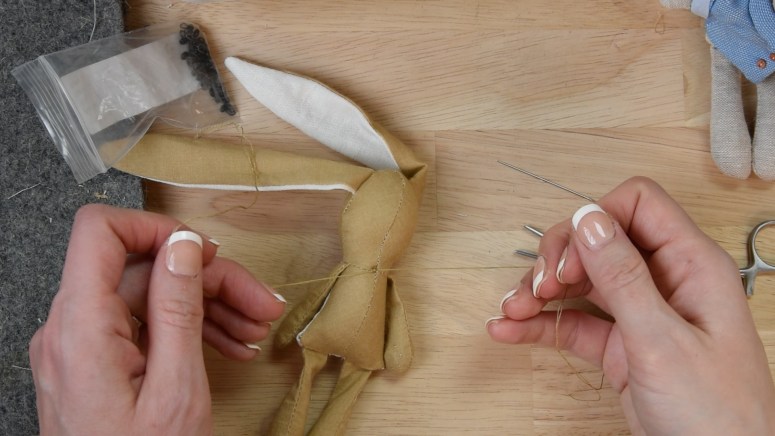
Sewing glass eyes onto a softie is a great way to add some extra character and detail to your soft toy. I love the way glass eyes add a bit more polish than the plastic safety eyes. When I first saw them in a package I remember wondering how in the world you’d ever get them to stay in your doll. In this tutorial, I thought I’d go through the process of inserting a glass eye into a softie so you will know what to do with them next time you see them.
Materials Needed:
- Softie
- Glass eyes with wire loops
- Strong thread that coordinates with the fabric color of your softie
- Sewing needle
- Scissors
Step 1: Mark the Eye Placement on Your Softie
Decide where you want your glass eyes to be placed on your softie. Use a pencil or removable marking pen to make a small dot where you want each eye to be placed.

Step 2: Thread One Eye onto Strong Thread
Thread one eye onto the strong thread that coordinates with the fabric color of your softie. Put both ends of the thread through your needle.

Step 3: Sew Glass Eye onto Softie
Sew into your eye placement mark and out through the back of the neck. Leave the string there.
This may be the hardest step, depending on the material you are sewing through. The loop of the eye is rather large, and it’s not always easy to get it to fit through the weave on your fabric. In the video tutorial, you can see my process for this in more detail. When inserting a glass eye into a softie made of cotton or linen, I usually stick a needle in the eye placement and ease a larger hole into the weave of the fabric. I do NOT cut the fabric, especially not for these little tiny eyes. The fraying would be too much. Instead, you just need to have a bit of patience and work the weave open a little bit at a time, then try to pull the eye through.

Step 4: Repeat with Other Eye
Repeat step 2 and 3 with the other eye.

Step 5: Secure the Strings Together
Tie the two strings together in the back of the neck and sink the threads into the softie. I like to triple or even quadruple the knot when making a toy that will be played with. This does make the knot more noticible in the back, but it’s work it to me to make sure things are secure.
Tips:
- Be patient and take your time with the process. Especially when getting the loop through the fabric without cutting a hole. It’s better to take your time and get it right than rush and end up with a too large hole in the eye of your toy.
- Use strong thread to ensure that the eyes are securely attached to your softie. I usually use a strand or two of embroidery floss because I have a variety of colors on hand, so it’s easy to match the thread to my softie fabric.
- Use glass eyes with wire loops that are the appropriate size for your softie. If you need to, trace a circle the size of your eye onto the face of your doll to get an idea of what the eye will look like at the size you are thinking.
Benefits of Glass Eyes:
- Glass eyes can add a beautiful and unique look to your softie. In my opinion, the gloss of the glass and smooth finish really do look a lot nicer than a plastic eye.
- They come in a wide variety of colors and sizes, making it easy to find the perfect eyes for your project. This is especially true when making small items, like the Mini Bunny Doll I was working on for this tutorial. It’s hard to find plastic safety eyes small enough for something like this! But glass eyes come in tiny sizes.
- I was originally worried about adding anything glass to a toy, but the glass eyes I have used have been extremely more durable than I had originally thought. While I wouldn’t recommend them for a child young enough to worry about chocking hazards, I haven’t had any issues with older children playing with my glass eyed dolls. For example, my son is 4 1/2 and I don’t even think twice about him playing with these dolls with glass eyes. We have never had any issue at all. Obviously, please use your best judgement when deciding what is right for the kids in your life. I just thought I’d add this in case the glass aspect worried you.
Downsides of Glass Eyes:
- Glass eyes are not as secure as safety eyes, so they may not be the best choice for toys that will be played with by very young children.
- Glass eyes can be slightly harder to insert than safety eyes, so you may need to practice a few times before you get it right.
In the end, I was so glad I decided to try out these looped glass eyes. They have added so much beauty to my projects. I will definitely be keeping them on hand to use for many projects to come.